One of its great feature is the ability to Manage MX entries in WHM, let us take a look on how we can Manage MX entries in WHM. Watch the flash video of this episode: Managing MX entries in WHM
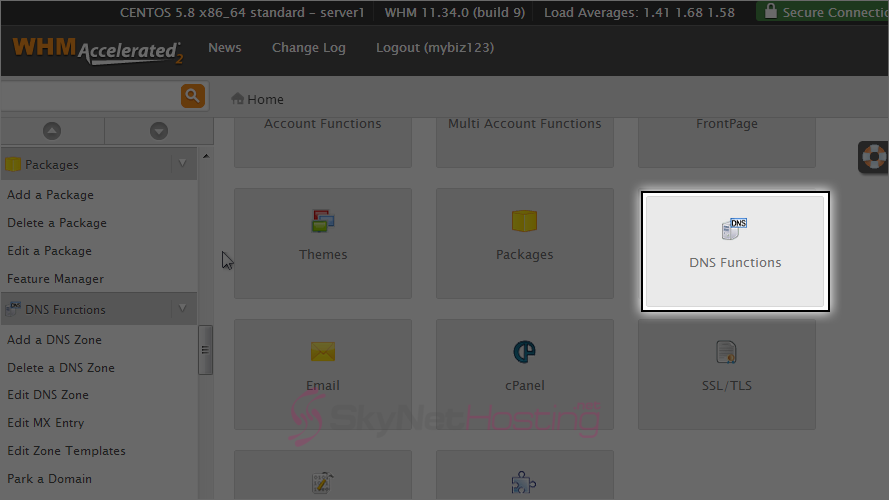
- Log into WHM and click the DNS functions link.
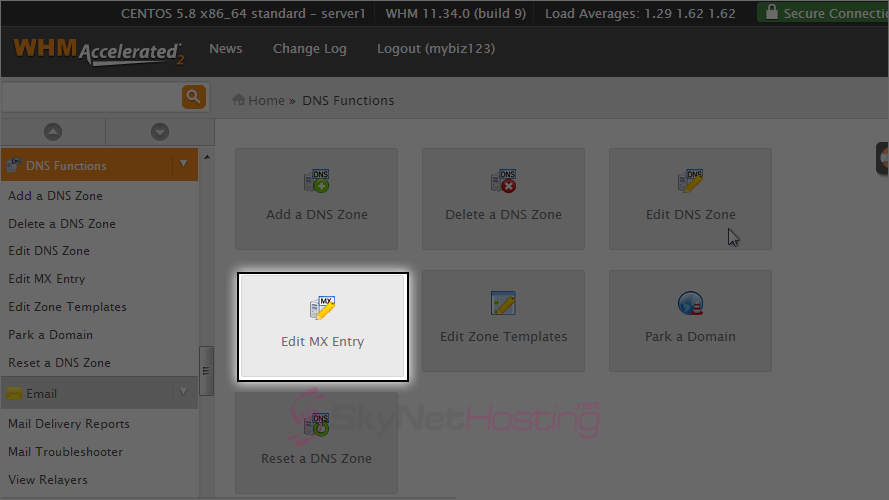
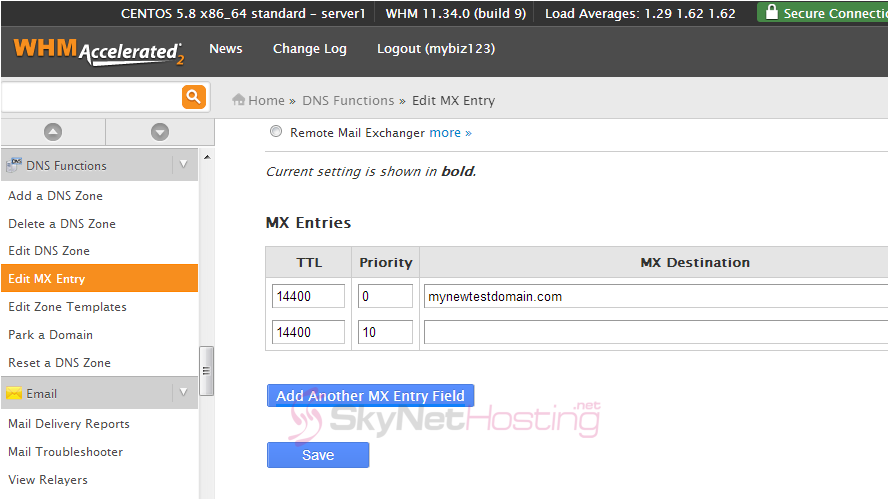
- Now click the Edit MX entry link.
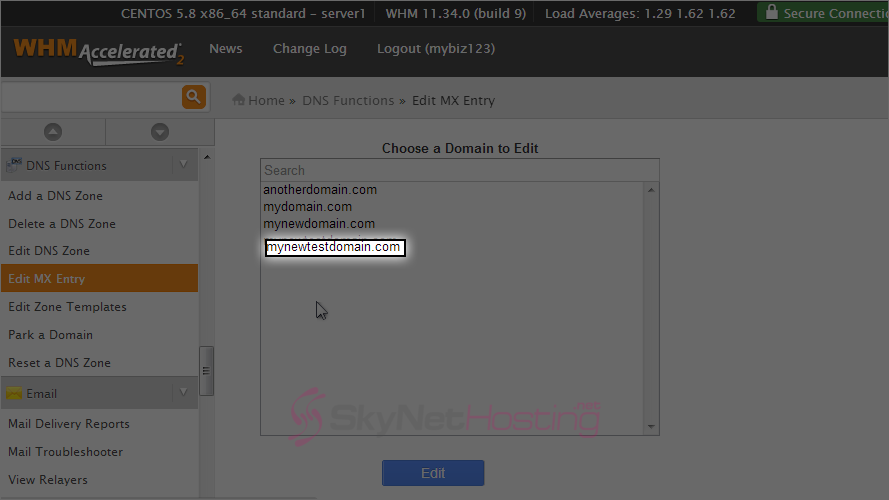
- Now select the account for which you want a customized MX entry.
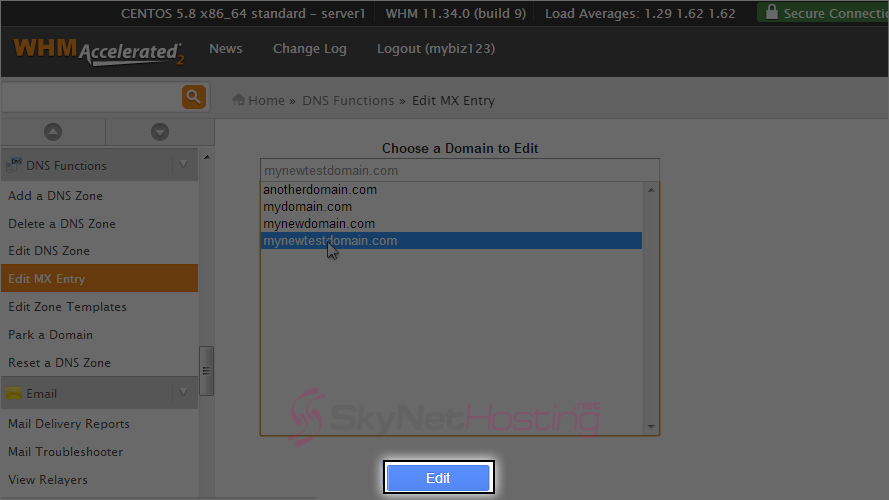
- Click Edit.
- This is where you can specify a custom MX entry. You may want to do this for customers who want their email hosted elsewhere on another server. In those cases, you would enter the other server’s IP address here and click Save.
Managing MX entries in WHM
This is the end of the tutorial. You now know how to manage MX entries in WHM. Remember that unless you want to point mail to a different mail server (not in this server), you never have to modify your MX settings.