MyCompanyWeb Installation Guide – Installation Steps V2.1
MyCompanyWeb is a premade, WHMCS back-end supported, complete private-labeled, retail website from where your customers can sign up for various products and services. It’s just a matter of minutes before you can start your very own web hosting company with MyCompanyWeb installed.
MyCompanyWeb Installation checklist and the average time that takes to complete each tasks. If you are a complete newbie it may take more time to to complete each task depending on your experience.
1. Activate MyCompanyWeb from skynet member area – 5 Minutes.
2. Create a subdomain to install WHMCS (bankend/member area for customers) – 2 Minutes
3. Install WHMCS from cPanel using Auto Installer – Average 10 Minutes
4. Install MyCompanyWeb – Average 15 Minutes
5. Publish site, customize it, upload logo and install predefined hosting packages – 35 Minutes
6. Customize the predefined hosting packages and change prices (if needed)
7. Add your WHM (Reseller Account) to WHMCS. (If you need automate account creation)
8. Enable cPanel Module for hosting packages. (If you need automate account creation)
9. Configure domain reseller account – Average 15 Minutes
10. Add a payment gateway to receive payments (PayPal, 2Checkout etc.) – 15 Minutes
DONE! in 97 MINUTES.
1. Activate MyCompanyWeb.
To activate MyCompanyWeb go to your member area > Services > View Available Addons > MyCompanyWeb (Before activating you must make sure you are on a reseller plan that supports MyCompanyWeb). Once it’s activated you can download it from Members Area > Services > My services > Choose Related Service > Overview > Downloads > MyCompanyWeb. Before starting the install make sure your domain points to your hosting account with skynet, install will not work if you domain is not pointing to us.


2. Create a subdomain to use as a bankend/member area for customers.
You should install WHMCS on a subdomain, click here for step by step instructions on how to create this subdomain. (Please note that you can not install MCW on addon domains)
3. Install WHMCS from cPanel using Auto Installer.
You can install WHMCS as explained here. After installing WHMCS when you login to it for the 1st time, you would be getting the following message, please make sure to click on “Don’t Show This Again” and close the window as you would be doing the configuration using MyCompanyweb. If you need to access this feature at a later time you can access it from WHMCS > Setup Wizard. (If you have already installed WHMCS you can ignore this step.)

4. Install MyCompanyWeb.
A. Login to the cPanel of the account that you are installing MCW and open file manager ( cPanel > File Manager ) and upload the “MyCompnayWeb.zip” file to the “addons” of whmcs as shown in the following image. The folder path is public_html/whmcs-install-folder/modules/addons .

B. After uploading the “MyCompanyWeb.zip” file, select it from File Manager and click on “Extract” button as shown on the following image. It will create the MyCompanyWeb folder inside the addons folder and extract the files to it.


C. Open whmcs admin area and go to Setup > Addon Modules > MyCompanyWeb and activate it by clicking on [Activate] button, then click on [configure] button to configure the addon. You will be asked to enter the following:
Install Domain: ……… [ e.g: mydomain.com ( without http://www. ) ]
WHMCS Install Path: ….. [ e.g: Assume that you install WHMCS in folder “billing” path will look like, “public_html/billing/” ]
cPanel Username: …….. [ Your cPanel username, it’s in your welcome email ]
cPanel Password: …….. [ Your cPanel password, it’s in your welcome email ]
Access Control: ……… [ Generally you should only tick “Full Administrator” ]
After configuring the above options, please click on [Save Changes] button.
5. Publish your site and customize it, upload your logo, install predefined web hosting packages
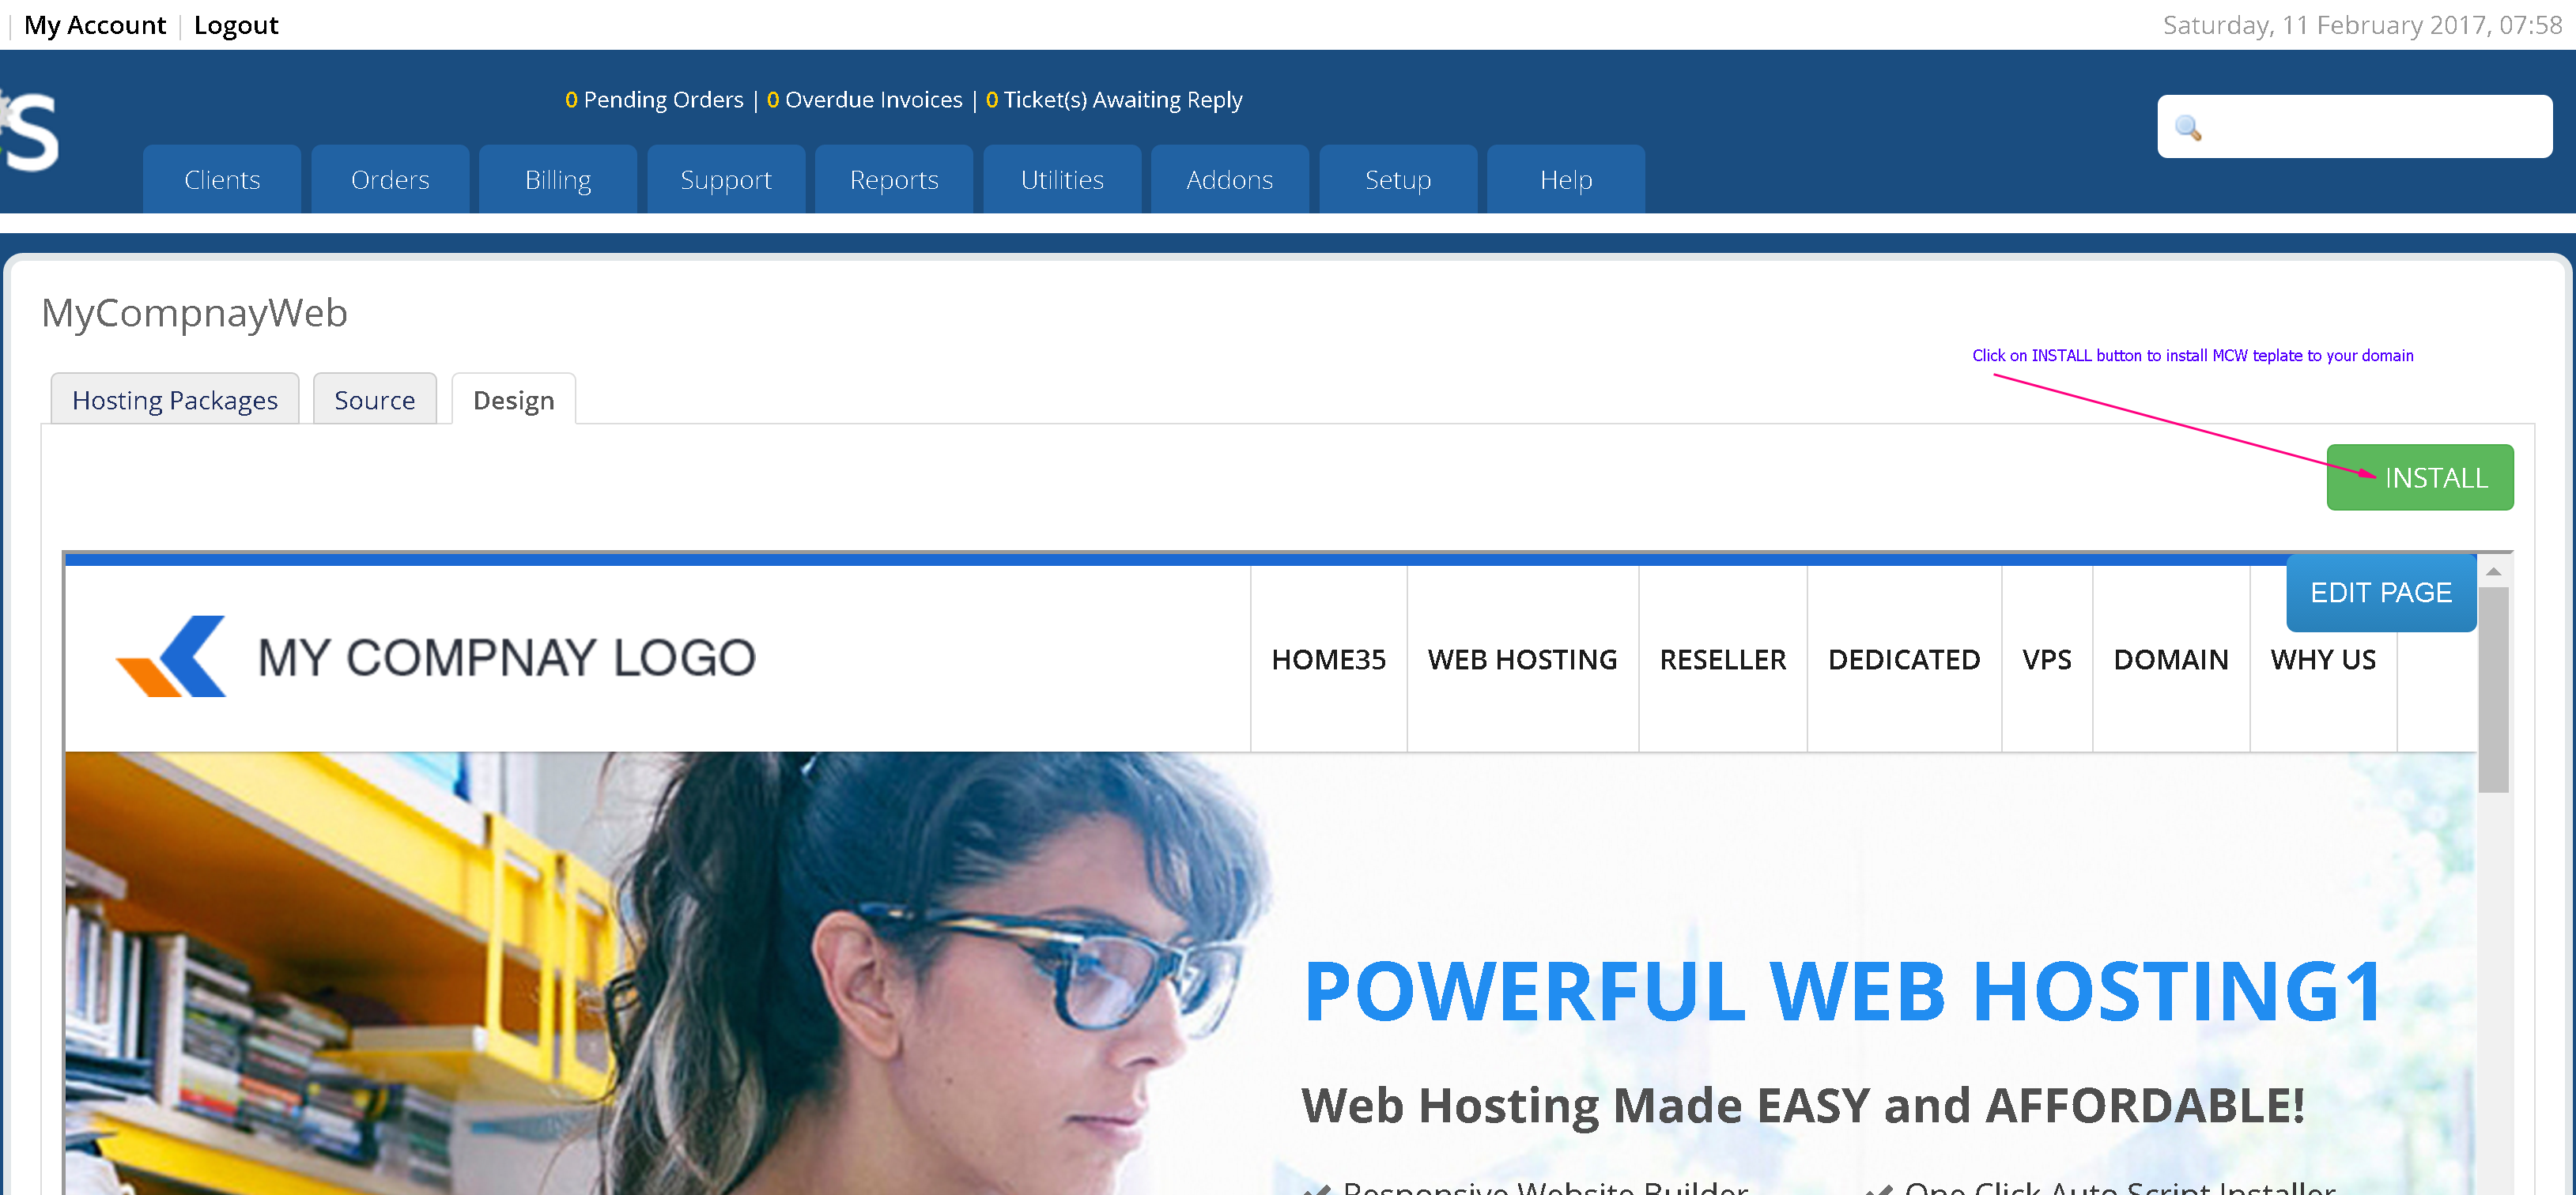
Access MyCompanyWeb addon from your WHMCS member area > Addons > MyCompanyWeb. From the MyCompanyWeb interface you can do the following functions.
[Install] You can use the Install button to publish MyCompanyWeb, complete reseller hosting web site, to your domain name, where you can instantly have your own fully functional hosting brand online.
[EDIT] You can edit any aspect of your hosting site in real time with zero coding/html knowledge. 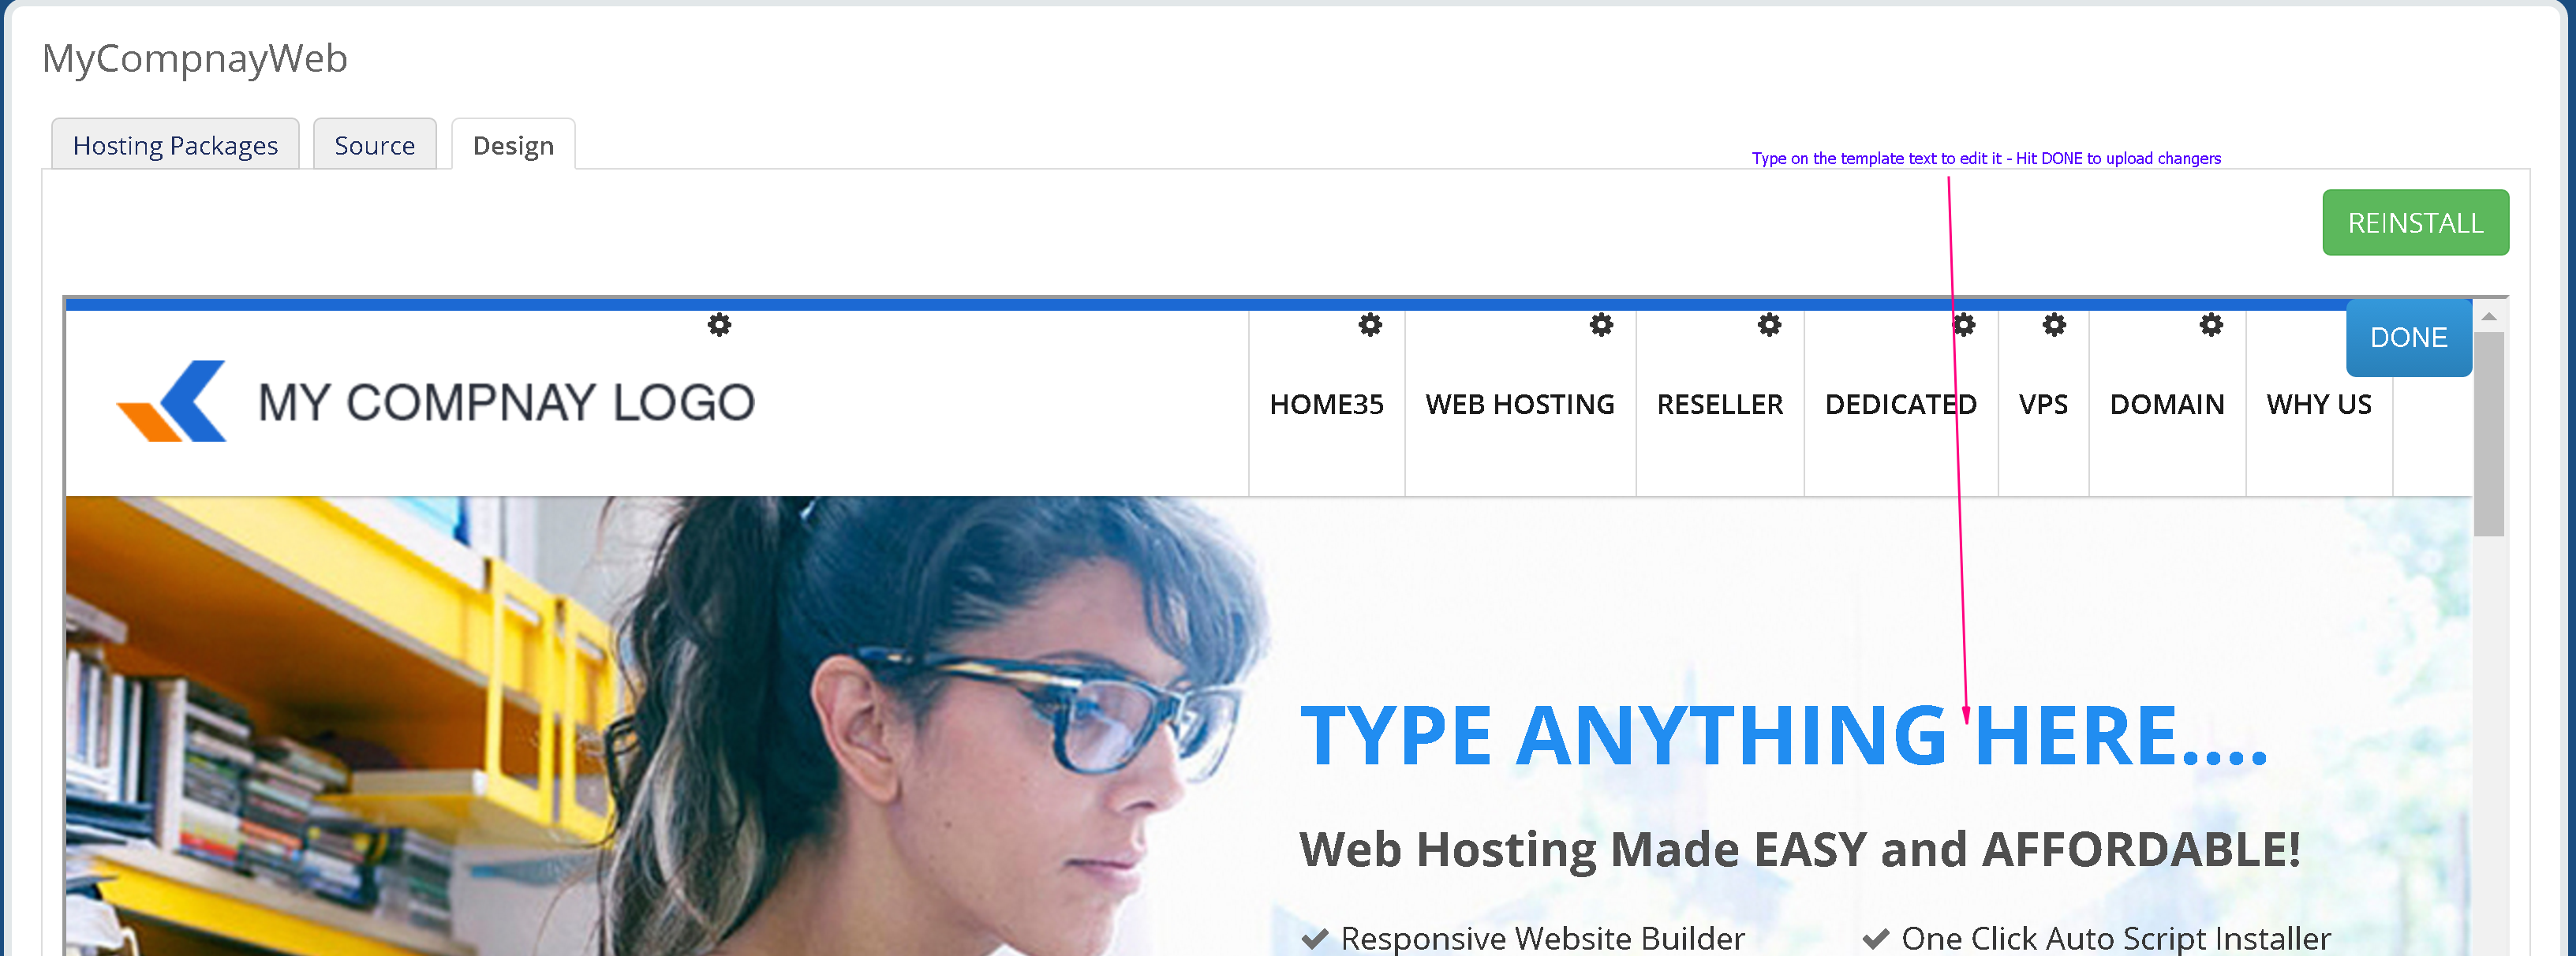
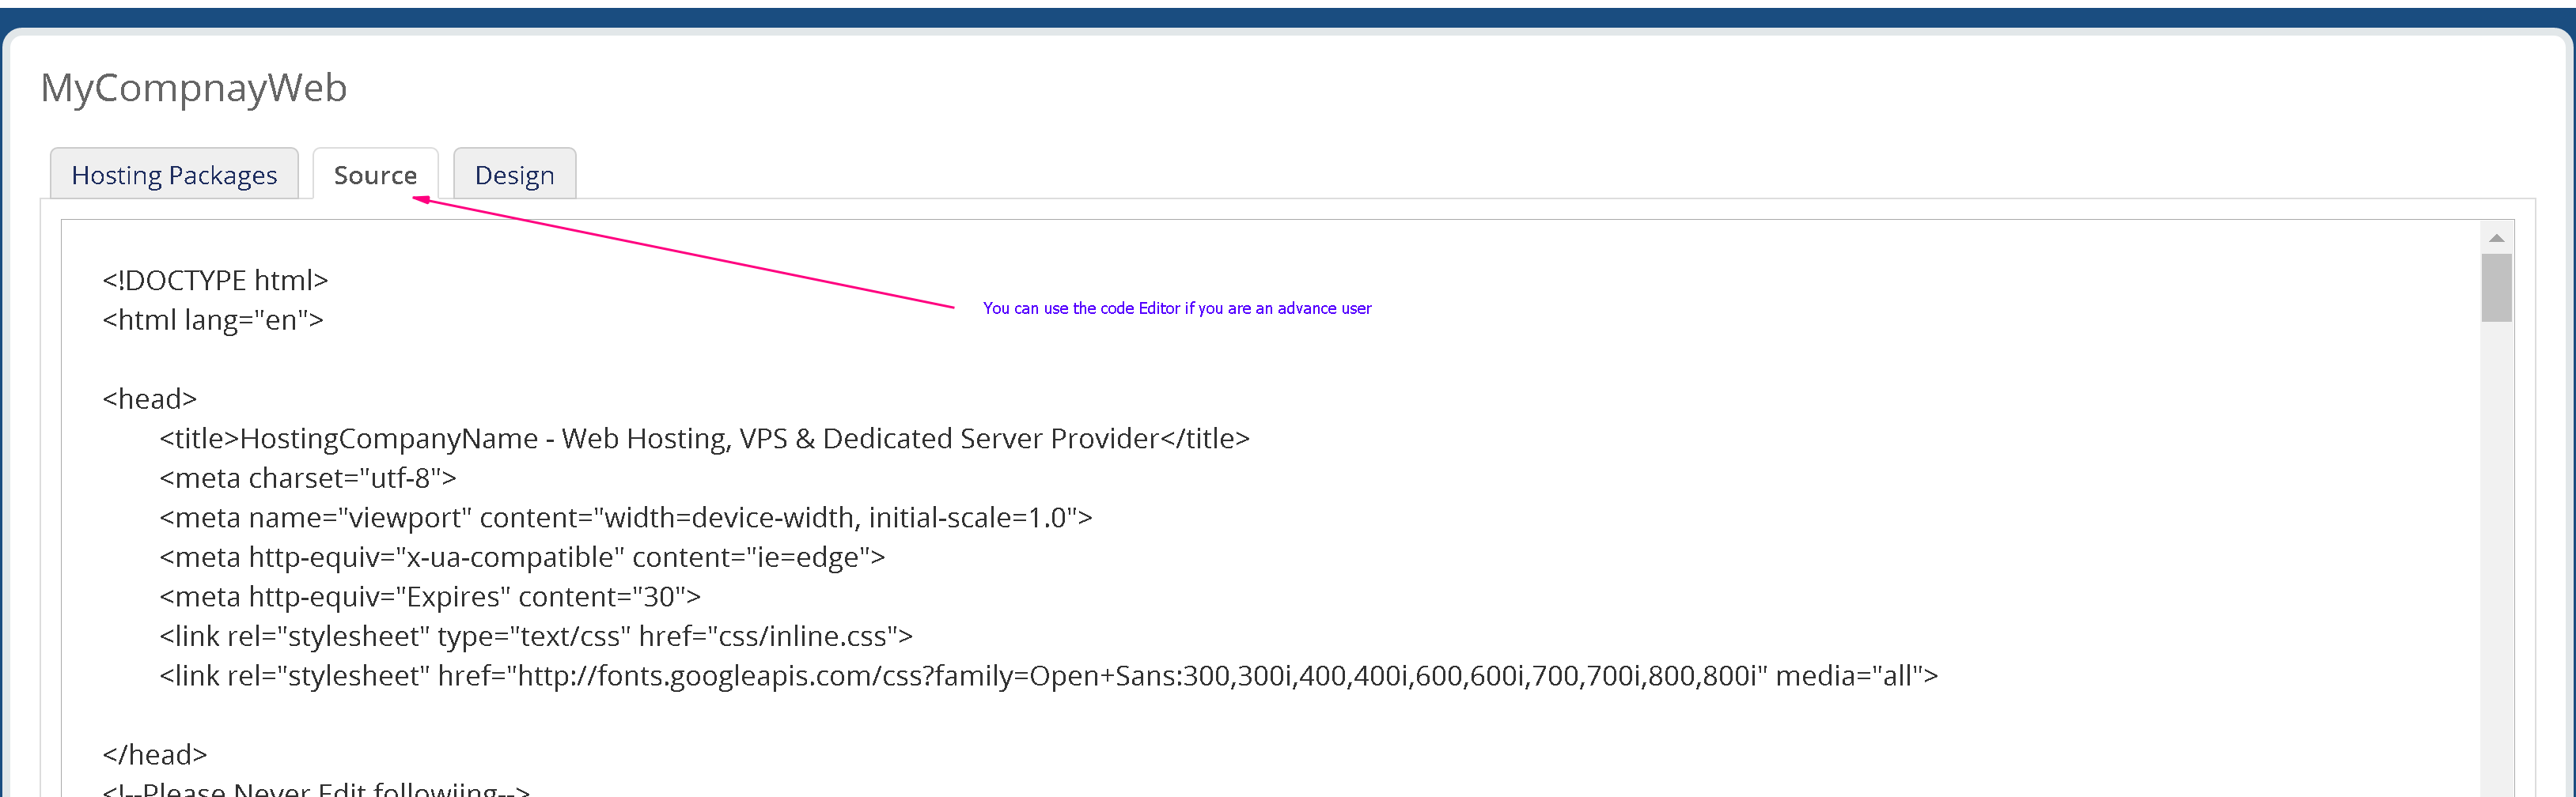
[Source] If you are an advanced user you can also directly do changers to your my company web’s website’s html code, however most of the users don’t need to use this option. We recommend code editing for advance users only. If you must need to edit the code please make sure not to remove/edit any of the following functions.
[Install Hosting Plans] With this option you can install a set of predefined hosting plans with just click of a button, saving hours of configuration time. You can not only sell your hosting plans but all our plans including dedicated servers with us to 40-50% discount.

6. Customize the predefined web hosting packages and change prices (if required).
The prices are plans on MCW is predefined for users convenience however you can always add you own plans or edit the current plans/pricing from your WHMCS Member Area > Setup > Products/Services > Products/Services page. For detailed documentation click here.
7. Add your WHM (Reseller Account) to WHMCS.
If you would like to fully automate the account creation, suspension and terminations etc. you would need to connect your WHM with WHMCS. You can do this from WHMCS Member Area > Setup > Products/Services > servers. This procedure is explained here.
8. Enable cPanel Module for hosting packages.
To automate your account creation you should also need to enable the cPanel addon for your hosting packagers. This procedure is explained here.
9. Configure domain reseller account.
Before selling domains you must configure your domain reseller account with WHMCS as explained here. You can use your own domain reseller account (if you have one) or the one we offer for free.
10. Add your prefered payment gateway to receive payments from customers.
You can add your payment gateway (eg. PayPal account) to collect payments from your clients from your WHMCS Member Area > Setup > Payments > Payment Gateways. If you don’t already have a you can sign up for a 2checkout payment gateway and configure it with WHMCS as explained here.
That’s it. You are READY to start selling!