Before making any changes to your website backing up your website is a necessary step for all users and it is considered as good practice. cPanel’s backup wizard is a built-in backup tool to assist you with creating backups. Backup wizard creates a compressed file of your website which you can download and store on your computer.
The process of creating a full cPanel back may take a while; but it’s worth waiting as this ensures you back up everything of your site including emails. This is the safest method to ensure proper safety. So we encourage all our customers to maintain your own backup. You can take backup of databases, files and email forwarders.
Okay, let’s see how this is done in detail first. Do check out the video tutorial on Getting familiar with cPanel – How to take a backup using cPanel as a summarized version of this detailed explanation. We will be looking at:
How to take a Full Backup?
- Log into your cPanel account and locate the “Backup Wizard” icon under the “Files” section.

- Next, choose Backup.
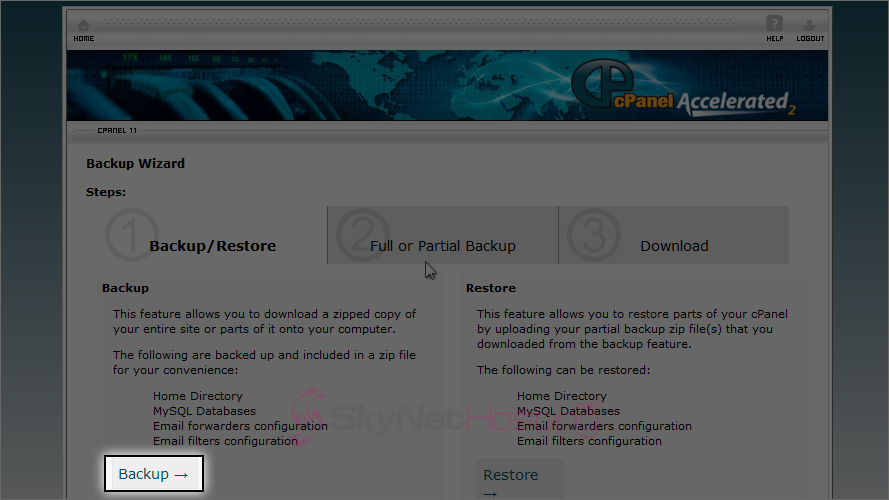
- Then choose Full Backup.
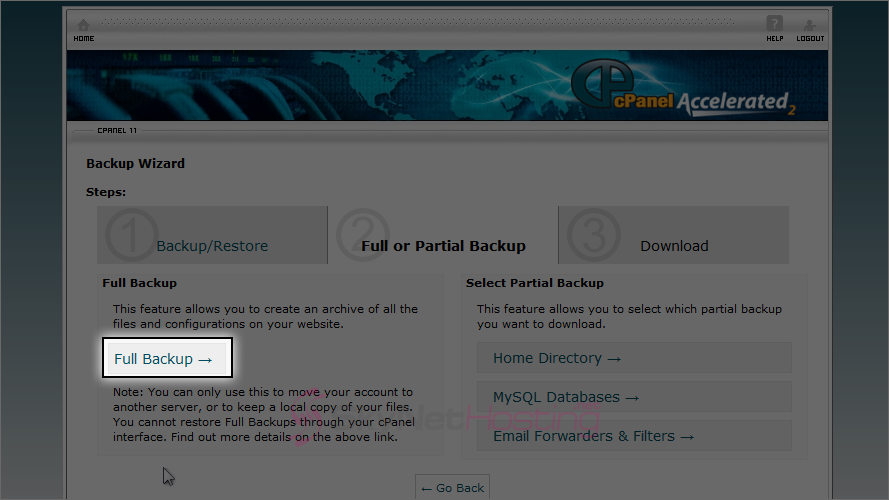
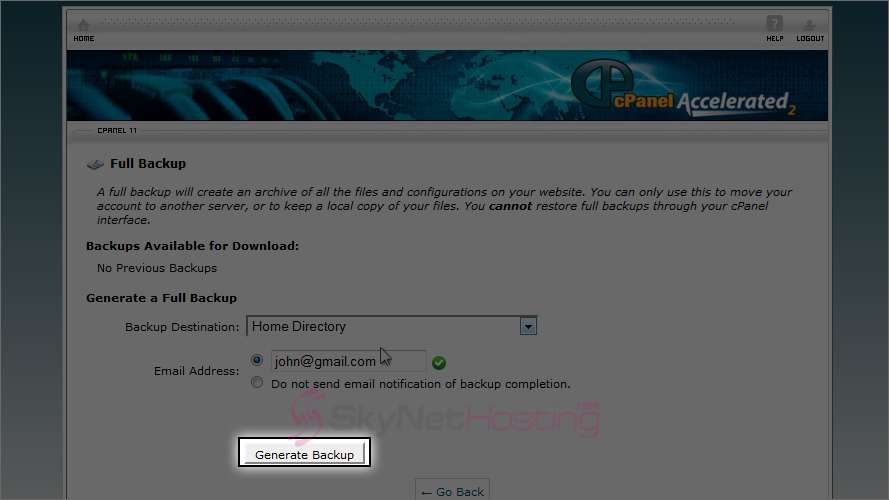
- Set a destination for the backup to be stored.
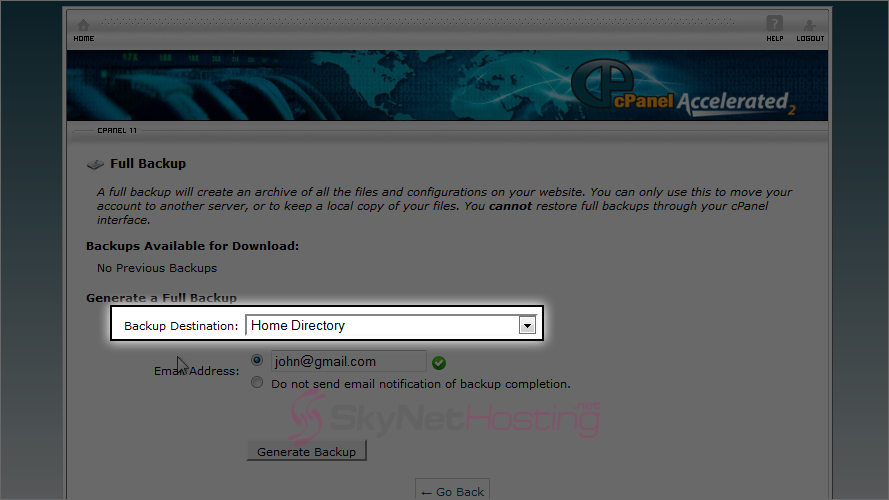
- Now click on Generate Backup. This completes creating a full backup to the home directory.
- To download a copy of the backup to your computer, simply click on it.
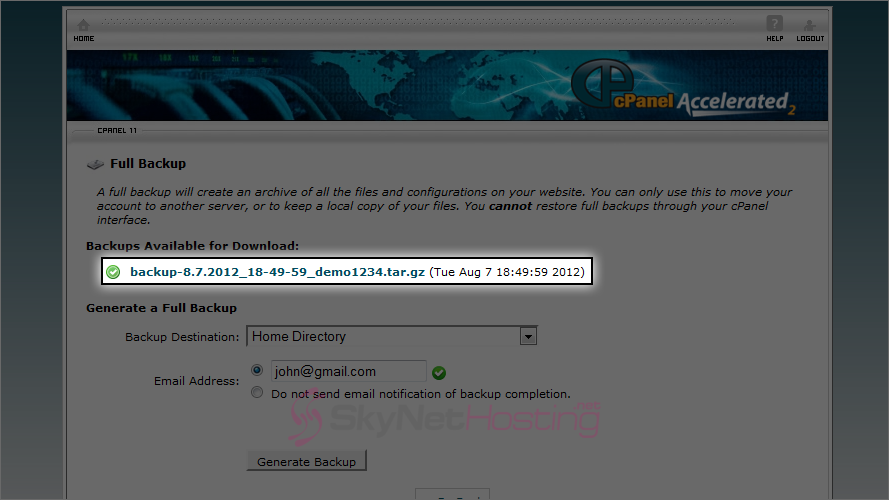
- Now to save it to your computer, click on Save. Properly storing and managing your backup is indeed very important .

How to take a Partial Backup?
For an instance, let’s say you wanted only to backup a file in your home directory or a single database, you can perform a partial backup.
- Just as before log into your cPnael account and click on Backup Wizard of the Files section.
- Once again click on Backup and on the next screen.
- Instead of clicking on Full Backup, select what you want to take the backup from in Select Partial Backup section.
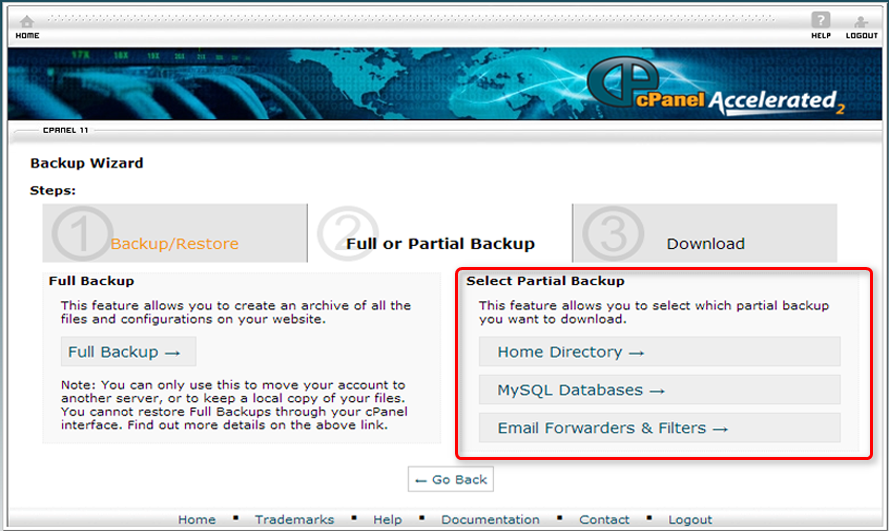
- If you chose Home Directory, on the next screen click on the Home Directory button and a zipped file of it will start to download.
- If you choose to backup MySQL Databases, select the database you wish to backup and it will start to download in zipped format.
- And if your choice was to backup Email Forwarders & Filters, click on it and select the one from the Forwarders to download it’s backup.
Congratulations, you have learned how backed up your site partially and entirely. It’s time to restore the site.
How to Restore a Backup?
Restoring is just as easy as the rest. Following steps will guide you on restoring the full backup.
- Click the Backup Wizard icon under Files again.

- This time click on Restore.
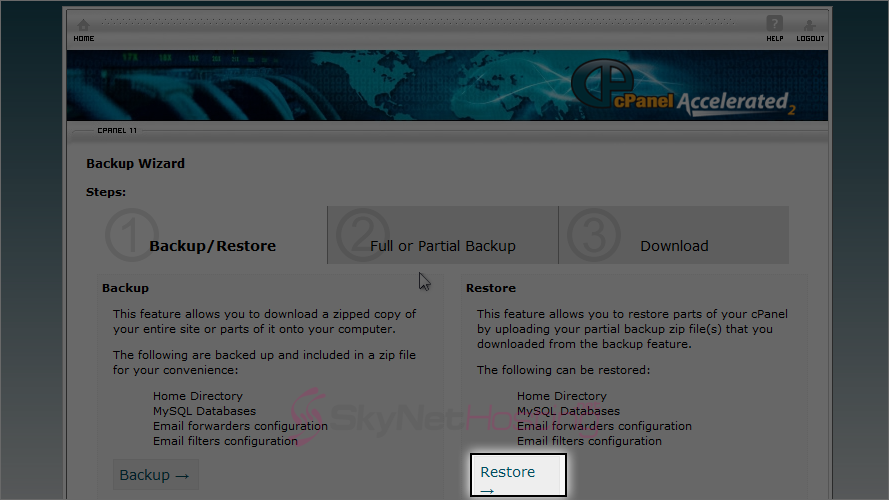
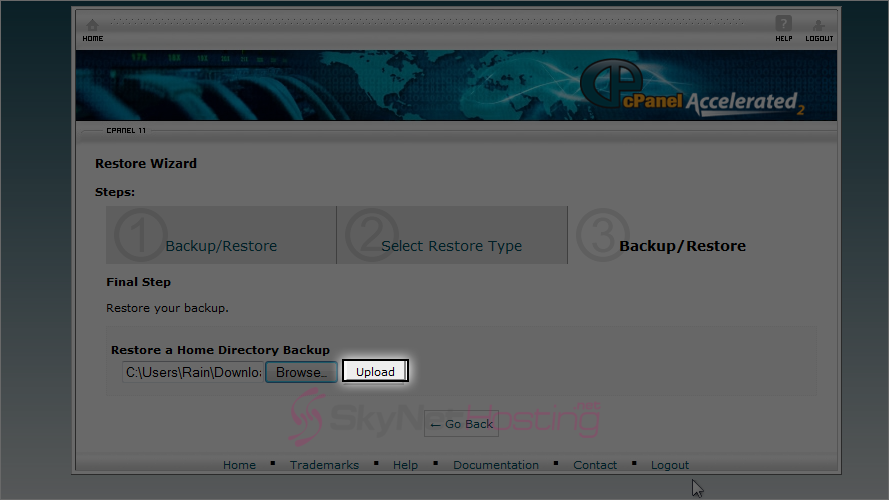
- Choose what type of restore you want to perform. In this case, let’s restore the Home Directory.

- Click on Browse button to locate the home directory to backup.
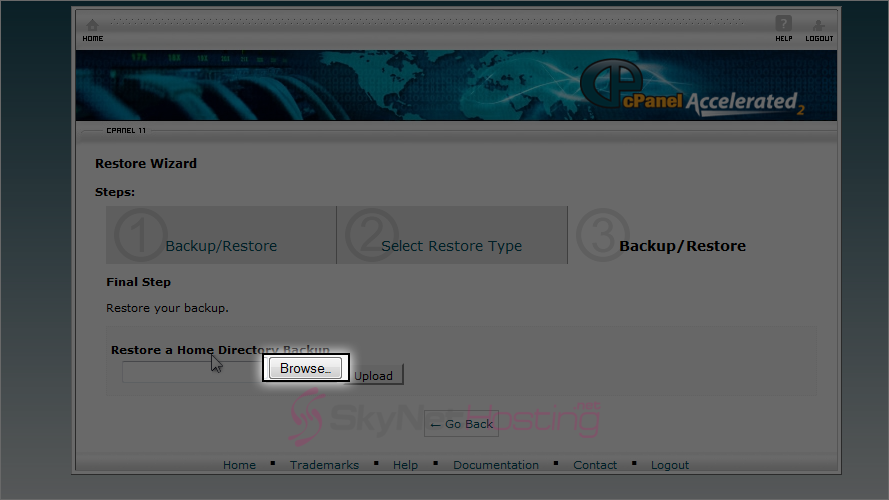
- Finally click Upload to upload the files.
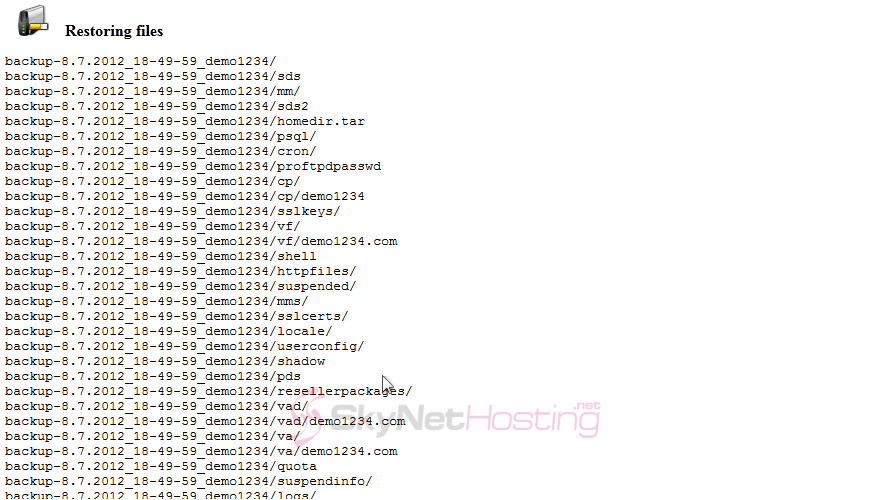
- On the ext screen restored files will be shown.
How to take a Backup in cPanel
And that’s it! Now you know how to take both partial and full backups plus how to restore a backup.Please click here to learn about all functionalities listed in the Files section of cPanel control panel.