With email filtering you can select messages which include certain symbols or strings of characters and choose either to remove them or send them to another email. In this tutorial we will learn how this can be done, step-by-step with screen images of each step. Watch the video on Getting familiar with cPanel – How to create Account Level Filtering in cPanel? which is also included here.
Setting up Account Level Filtering, step-by-step
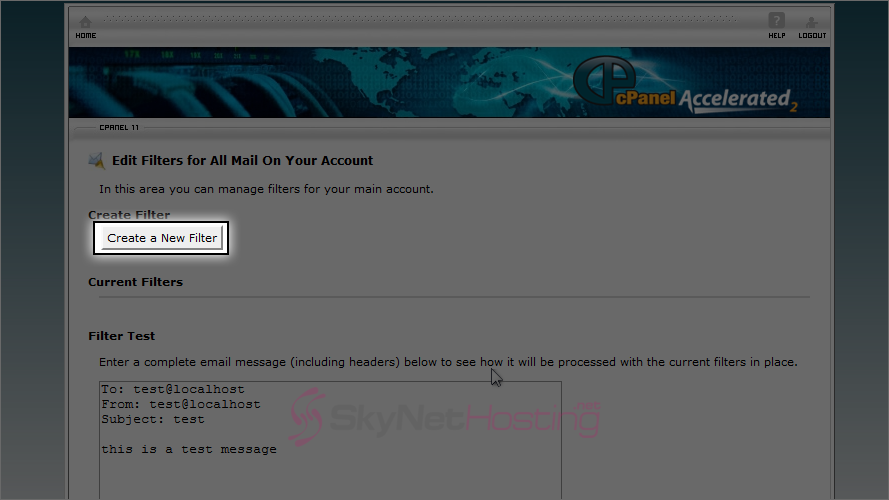
- Log into cPanel and click the Account Level Filtering icon, found under the Mail section.

- Click on Create a New Filter.
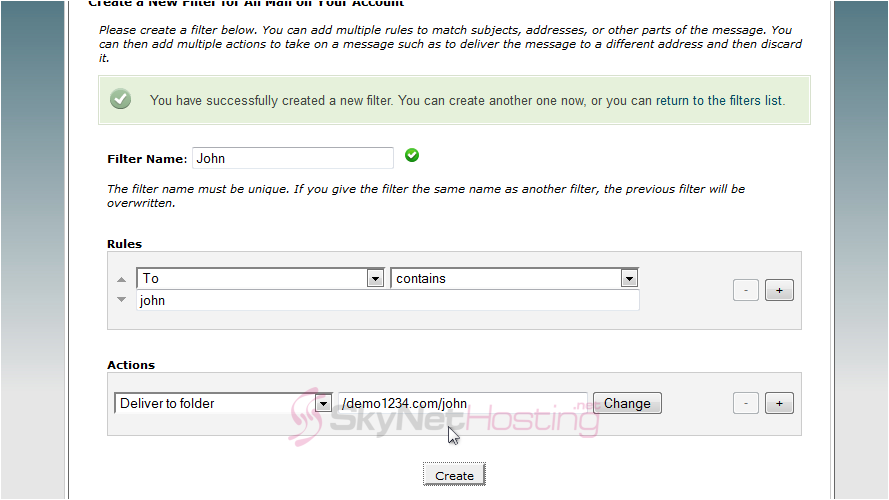
- Enter a name for the filter.
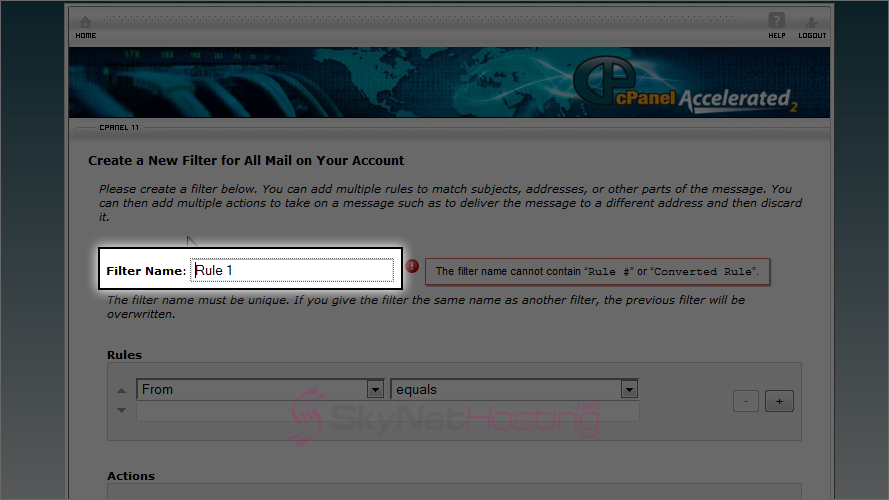
- Mention the filter rule.

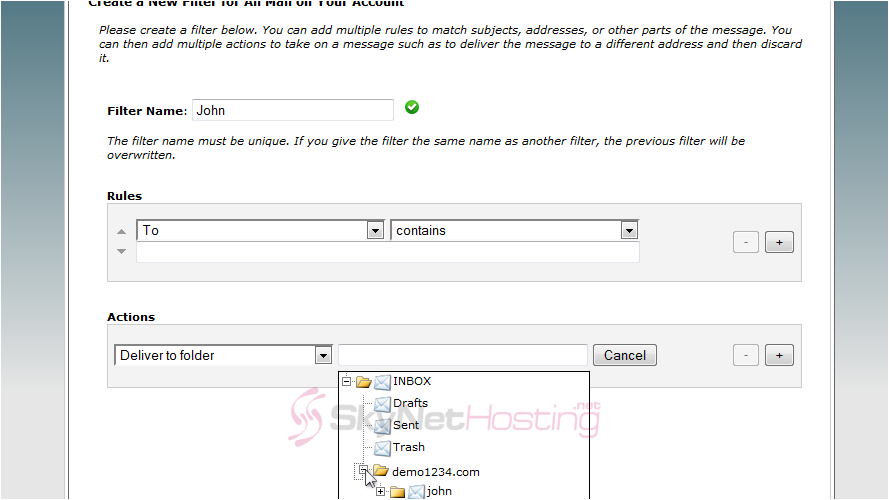
- Choose an action for when the TO field contains the text “john”.

- For example, in this case the action is set to deliver the email to the folder named “john”
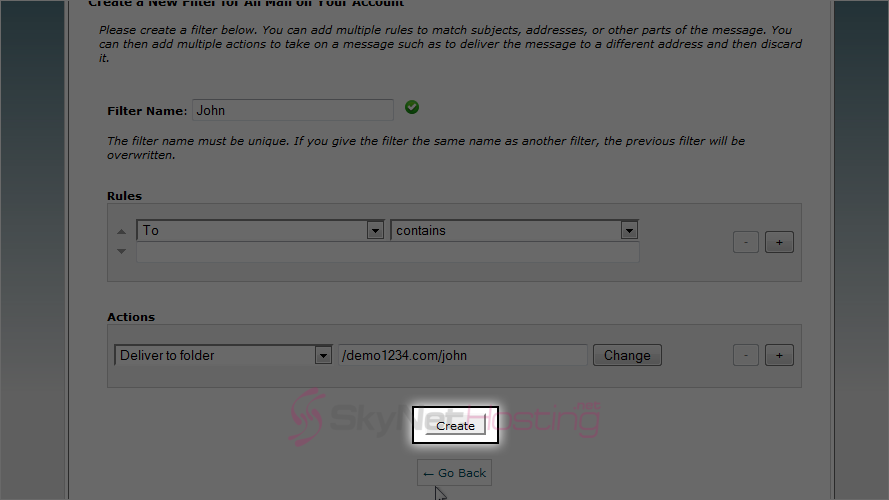
- Click Create.
- A confirmation message something similar to this will show up so you know that it was a success.
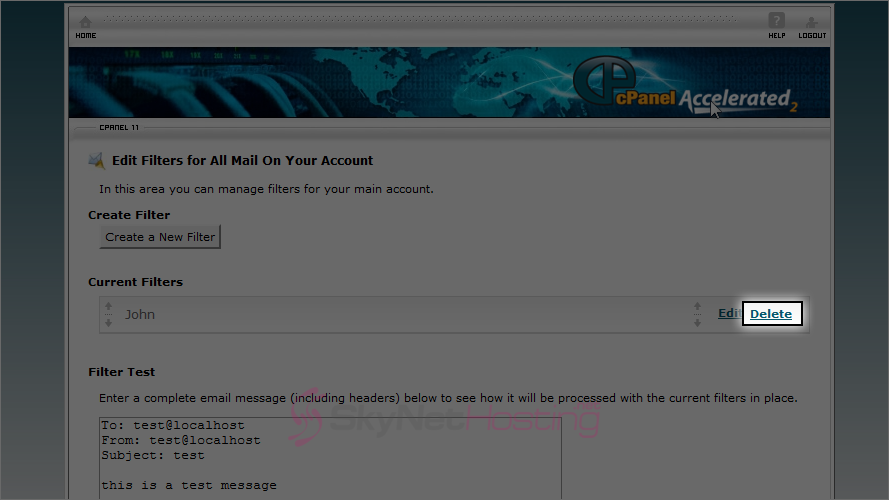
- You can choose to edit or remove existing features from here.
How to create Account Level Filtering in cPanel?
There you have it, your first cPanel user level account filter. Checkout other cPanel Mail tools