The domain reseller account comes free with all of our reseller plans. It allows our resellers to buy domain names for as low as $6.95 per year, and is compatible and works well with WHMCS.
By using the WHMCS plugin, you have the opportunity to enable domain selling to be done automatically making it convenient for all your customers, as it will only require them to do the payment and wait for the welcome email from your WHMCS system.
This tutorial is written to explain what you need to follow to successfully configure your domain reseller account with WHMCS, let’s see how it’s done.
Register for a free reseller account
- First of all, you would need to register for the free reseller account. To do that, refer the URL given under $6.95 DOMAIN RESELLER ACCOUNT section in the welcome email you received from SkyNetHosting.net.
- Fill in the form with the relevant details, making sure you fill in all fields marked with an asterisk. Check the box to confirm you’ve understood and to abide by the rules and regulations of the application before you click on the “Submit” button.
- On completion, you will be directed to a success page, letting you know that an email has been sent and the registration was a success. The email sent to you will contain valuable information pertaining to your reseller domain account, therefore make sure to keep it safely.
Configuring the reseller account with WHMCS
Now, log into your WHMCS admin panel and do the following:
- Start off by activating a domain registrar. To do that, go to Domain Registrar from Setup > Products/Services > Domain Registrar and choose a registrar (NetEarthOne) by clicking on the Activate button which is in front of the registrar’s name. To configure the registrar, your reseller ID and an API key is required, we will look at this in the next section.
- Next, you need to define the selling prices of your TLDs (Top Level Domains). Go to Domain Prices from Setup > Products/Services > Domain Pricing and build up your TLD list. You can add the TLDs under TLD and set the related prices by clicking on Open Pricing.
- Choose NetEarthOne for the Auto Registration filed to the chosen Domain Registrar for each TLD.
- Now to integrate the code for checking domain availability, copy the HTML code given under Domain Availability Lookup, by going to Utilities > Integration Code, and paste it in the page where your domain search box is. By doing this, any potential client will be able to perform domain checks using WHMCS directly from the page you inserted the code.
NOTE: If you do not set the prices for the TLDs, the TLDs will not be visible for your clients to choose and purchase. Therefore, defining the prices is important.
Collecting the Domain Reseller ID and the API key
- As mentioned before, to configure the chosen domain registrar, you need to have your reseller ID and the API key. Both these values can be found in your DomainPlex domain reseller account and you will also find your reseller ID in the email sent to you at the time you created the domain reseller account.
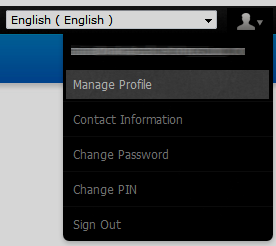
- To locate the ID and the API key, log into the domain reseller account you just created at the beginning of this tutorial. Locate you reseller ID by clicking on Manage Profile
- Locate the API key, by clicking on API from Settings > API. Keep a note of both these values as they will be required when we proceed with configuring the domain registrar.
- On the same screen you found the API key, under Whitelist your IP Addresses, enter the IP address of the server on which you have installed the WHMCS (in short it will be your primary IP) so authorizing it for API access is made possible. The API key is linked to your domain reseller account. In the case where an operation using the API is subject to a cost, the payment for that operation will be settled directly through your prepaid domain reseller account (DomainPlex) and you will be able to select from the API itself, which balance and currency shall be used.
- To complete the process, click on the Submit button.
Configuring the chosen domain registrar
- Log back to you WHMCS admin area and from Setup > Products/Services > Domain Registrar and click on the Configuration button of the chosen registrar.
- Enter the domain reseller ID ,the API key and click on Save Changes to complete the process.
That’s it! now you’ve successfully configured your free domain reseller account to work with your WHMCS. However if you want us to do the configuration, we will do it for a one time fee of $20. Just drop a support ticket with your domain’s WHMCS log in details to our help desk and our technical experts will attend to it immediately!